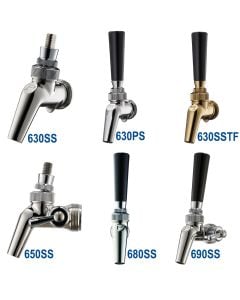
How to Maintain Your Perlick 600s Faucets?
- Jan 29, 2025

Maintaining your Perlick 600s Faucets is essential for ensuring long-lasting performance, reducing the need for repairs, and providing the perfect pour every time. This revolutionary faucet design eliminates common issues such as handle sticking, mold, and bacteria buildup, offering a smoother flow with less foaming. Here’s how you can maintain your Perlick faucet to keep it in top shape.
Why Choose Perlick 600s Faucets?
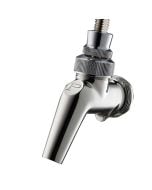
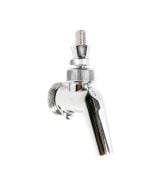
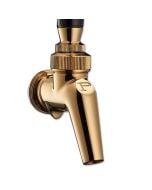
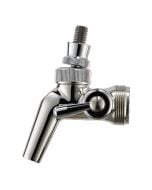
The Perlick 600s faucets feature a unique ball and floating O-ring design that eliminates the need for a valve shaft, ensuring beer is not exposed to air. With fewer internal parts, the 600s faucets are more reliable and require fewer service calls. The polished interior creates a smooth flow and reduces foaming, resulting in better beer presentation and customer satisfaction.
Regular Cleaning for a Perfect Pour
It’s important to clean your faucet regularly to maintain its function and ensure hygiene. Here's how:
- Pre-Cleaning Preparation: Before using your new Perlick faucet, clean it to remove any manufacturing residue. This can be done by following the cleaning instructions below or watching the instructional video.
- Cleaning While Installed: The best part about the Perlick faucet design is that it can be cleaned “in place.” Simply pump your cleaning solution through the beer system with the faucet handle in the open position (handle forward). No need to remove or disassemble the faucet! This will thoroughly clean all internal parts, including the floating O-ring and its groove.
- Soaking and Brushing: If you must remove the faucet from the dispensing head for cleaning, soak it in a cleaning solution for 10-15 minutes. Use a faucet brush inside the spout and brush out from the back of the faucet. There’s no need to remove the handle assembly. Rinse with clean water and reinstall it.
Replacing Worn Parts
If your faucet needs to be taken apart to replace worn parts, it’s essential to use only OEM (original equipment manufacturer) replacement parts. Here's how to disassemble and reassemble your faucet:

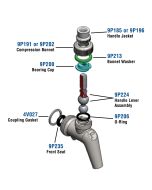
Disassembly Instructions:
- Soak the Faucet: If the faucet is used, soak it in warm cleaning solution for 1-2 minutes to loosen the bonnet and handle jacket. If the faucet is new, submerge it in warm water for 5 seconds.
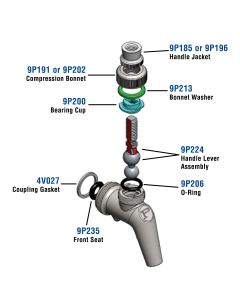
- Remove Handle Jacket: Unscrew and remove the handle jacket (9P185 or 9P196).
- Remove Compression Bonnet: Unscrew and remove the compression bonnet (9P191 or 9P202).
- Check the Coupling Gasket: Only remove the coupling gasket (4V027) if it’s worn or cut.
- Remove the Handle Lever Assembly: Lift the handle lever assembly (9P224) upward and push it back.
- Remove Front Seat and O-ring: Use a small screwdriver from the bonnet end to remove the front seat (9P235) and the O-ring (9P206).
- Inspect Parts for Wear: Always inspect the O-rings for wear or damage, and replace as necessary.
Reassembly Instructions:
- Install the O-ring: Re-install the O-ring (9P206) into the O-ring groove using a small, blunt screwdriver.
- Install the Front Seat: Re-install the front seat (9P235) into its groove. The seat must move freely in the groove.
- Reinstall the Handle Lever: Reinstall the handle lever assembly (9P224).
- Install the Bearing Cup: Reinstall the bearing cup (9P200).
- Install the Bonnet Washer: Reinstall the bonnet washer (9P213) into the compression bonnet (9P191 or 9P202).
- Tighten the Bonnet: Reinstall the compression bonnet (9P191 or 9P202) and tighten by hand only. Do not use any tools, as this could damage the faucet.
- Reinstall the Handle Jacket: Reinstall the handle jacket (9P185 or 9P196).
- Reinstall the Coupling Gasket: If you removed it, reinstall the coupling gasket (4V027).
Regular cleaning and maintenance of your Perlick 600s Faucet will help ensure its longevity and maintain the high-quality performance you expect. By following these simple cleaning and maintenance steps, you can reduce service calls, prevent the buildup of mold or bacteria, and keep your faucet working smoothly for years to come. For any necessary part replacements, always use OEM parts to maintain the integrity of your faucet.